
You can use Starton to integrate blockchain into your application in a few steps. Let's create a project to deploy a smart contract from Code with Starton's API.
not a developer?
To follow this tutorial, you will need coding experience. If it's not your case, you can still deploy your smart contract:
Step 1 - Initialize the project
-
Start by creating a directory for your project:
mkdir starton-deploy -
Then, get into your project directory:
cd starton-deploy -
With your project directory set up, install the dependencies:
npm add axios -
Then, use
touchto create aindex.jsfile and open it with your favorite editor.touch list.js
Step 2 - Add starton to your project
-
First, import
axios.const axios = require("axios") -
Then, initialize
axiosusing Starton URL and authenticate with your API KEY.Create an API key
   const starton = axios.create({
   baseURL: "https://api.starton.com",
   headers: {
       "x-api-key": "YOUR API KEY",
   },
})
Step 3 - Creating a wallet
Before we can continue you will need a Starton Wallet to sign our transaction.
Starton Wallet
Starton Wallet uses a KMS. Metamask is unavailable when using Starton from code. Since it is a browser extension, Starton API cannot access it from your project. For more information, see Understanding Key Management Systems.
We recommend you to create your wallet on Starton web application, but you can also create it from code if you'd like to automate it.
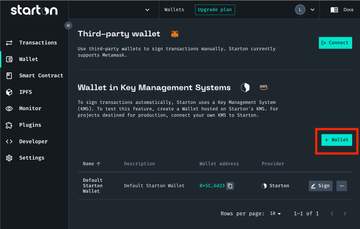
- From Dashboard
- From Code
For this tutorial, you will create a wallet on Starton's KMS. But when you want to go on production, you should import your own KMS Learn more.
starton.post("/v3/kms/wallet", {
   "description": "string",
   "name": "string",
   "kmsId": "kms_33333333333333333333333333333333"
})
.then((response) => console.log(`New wallet address: ${response.data.address}`)
.catch(error) => console.error(error.response.data)
Faucet
To interact with the blockchain you will need the native currency of this blockchain to pay the gas fees. On the testnet, you can claim free faucet here.
Step 4 - Deploy your ERC20 token
Starton Library
For this tutorial, you will deploy your own ERC20 token. Starton provides you with a library of smart contracts templates. Learn more.
Now, let's write your first API call!
starton.post("/v3/smart-contract/from-template", {
    "network": "binance-testnet", // you can choose any network
    "signerWallet": "YOUR STARTON WALLET", // This will be the wallet that pay the fee. Must be on starton, cannot be a Metamask wallet
    "templateId": "ERC20_META_TRANSACTION", // you can choose another template
    "name": "My first smart token", // the name that will be displayed on the dashboard, not on chain
    "description": "This is the first smart contract I deploy. ", // same, dashboard description and optional
    "params": [
        "My first token ", // Your smart contract name, on chain
        "MFT", // the symbol of your token
        "10000" + "000000000000000000", // 10000 token supply + 18 zero.
        "ANY WALLET YOU WANT" // The wallet that will receive the token supply, can be a starton wallet or metamask
    ],
    "speed": "average", // The fees you will pay on chain. More info HERE
}).then((response) => {
    console.log({
        transactionHash: response.data.transaction.transactionHash,
        smartContractAddress: response.data.smartContract.address,
        explorer: `https://testnet.bscscan.com/tx/${response.data.transaction.transactionHash}`
    })
}).catch(error => console.error(error.response.data))
Congratulations on your first request. Let's dive into what we just did:
- The endpoint
/v3/smart-contract/from-templateallows you to deploy audited smart contracts. You can also deploy smart contract your own code, or import an existing contract - We selected a blockchain network for your deployment:
binance-testnet. You can choose any network from our list of supported networks - We used the Starton KMS to sign the transaction and pay gas fee. This allows you to automate transactions, but also to sponsor the end-user fees with gasless transaction
- We used a ERC20 template. You can find more templates in Starton Library
- We had to put 18 zeros after "10000" as the smart contract will read the amount in wei (the equivalent of cents, except there are 18 decimals and not 2).
- We selected an average speed for your transaction. But with Starton everything is customizable. You can also set up a gas strategy to automate the management of your transactions.
Almost done! Now we can execute it to get our first contract deployed!
node list.js
And voilà, your first contract is deployed!
{
    "transactionHash": "0x43462af8448e34ea5cddbb73b4dcf5c0c04fa6155111273a1573ec6c4c9a59e8",
    "smartContractAddress": "0xB4B4a180f065b2461eF64359909fb0cfCb04D986",
    "explorer": "https://testnet.bscscan.com/tx/0x43462af8448e34ea5cddbb73b4dcf5c0c04fa6155111273a1573ec6c4c9a59e8"
}
Check all of your transactions on Starton Web Application
Congratulations on deploying your first smart contract! In this tutorial, you discovered how to deploy your first smart contract but this is only the first step.
What's next?
Learn how to: