In this tutorial, you will learn how to connect an AWS Key Management System (KMS) to Starton.
note
Starton provides test wallets hosted on our Key Management System, but when going in production, to maintain control over your wallets, you should use your own KMS.
To connect Starton to your AWS KMS, you can grant access to Starton only to one wallet of your KMS. You can also grant full access to Starton on your KMS.
info
By granting access to Starton only to one wallet, you’ll have to create new wallets and import them every time on your own.
Creating a wallet on AWS
-
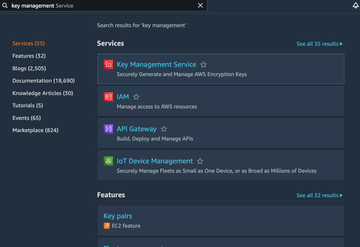
On your AWS dashboard, search Key Management Service.
You access a listing of your existing keys.
info
A key is an equivalent to a wallet in this use case.
-
Click Create a key.
-
Set up your key:
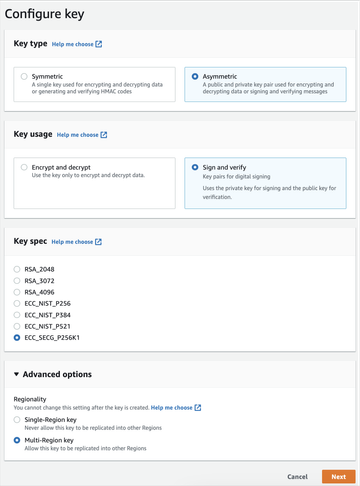
- In Key type, select Asymmetric. 1. In Key usage, select Sign and verify. 1. In Key spec, select ECC_SECG-P256K1. 1. In Advanced options, select Multi-region key.
-
Click Next.
-
In Alias, enter a name for your key.
-
Skip step 3 Define key administrative permissions.
-
In step 4 Define key usage permissions, in Other AWS account, enter Starton information:
- In arn:aws:iam::, enter
052805596453.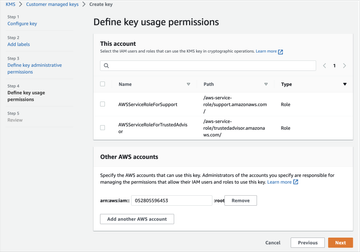
- In arn:aws:iam::, enter
Connecting your wallet on Starton
- From the Dashboard, go to Wallets.
- Click + Wallet.
- Select Connect a single Wallet from a Key Management System.
- Enter a Wallet name.
- Enter a Description.
- Enter the Key ARN. You will find it on AWS in the General Configuration panel following a
arn:aws:kms:eu-west-3:XXXXXXXXXXXX:key/mrk-XXXXXXXXXXXXXXXXXXXXXXXXXXXXXXXXformat.